Feb 27, 2013

Blender levelup

Hey!

I took some kind of holidays last few days and didn't really worked on Alone in Space. Rest is as usefull as coding nights. Leave your project as it is for a few weeks and then come back with fresh eyes and ideas.

To be honest, last days I was very unmotivated by this project, repeating to myself that I would NEVER be able to go ahead and make this dream come true.

The amount of work to do on this project is... huge. And I have to learn everything but programming. As I have no money to spend in hiring a 3D artist, I have to create my own assets. Lucky me, I'm very creative, and tenacious.

I worked the whole afternoon and night in learning how to create spaceships in Blender. Thanks to Blender Sensei for his amazing tutorials. In about 6-7 hours I learnt enough  tips to create my first spaceship model.

This is exactly what I wanted for this ship so I'm particularly proud :

Front view

Rear view 

Side view

Bottom view


This space ship is a Shuttle. With this kind of ships, the player will be able to move resources between colonies in the same region. Notice the jaws under the ship : this ship will be able to carry 2 containers.

Feb 7, 2013

Fixes on the Research Tree

Hello there. Quite a moment since I talked about Alone in Space. I had hard days at work and no energy nor motivation to get back on code during nights.

But that's it! I worked tonight!

First, I made improvements on the tree rendering. I was wondering why the game was taking so much time to completely close before thinking about a memory leak. And there it was. I burnt this bug. Now everything is fine! :-)

I also corrected some placements in the tree viewport. Some nodes were rendering outside of the viewport zone.

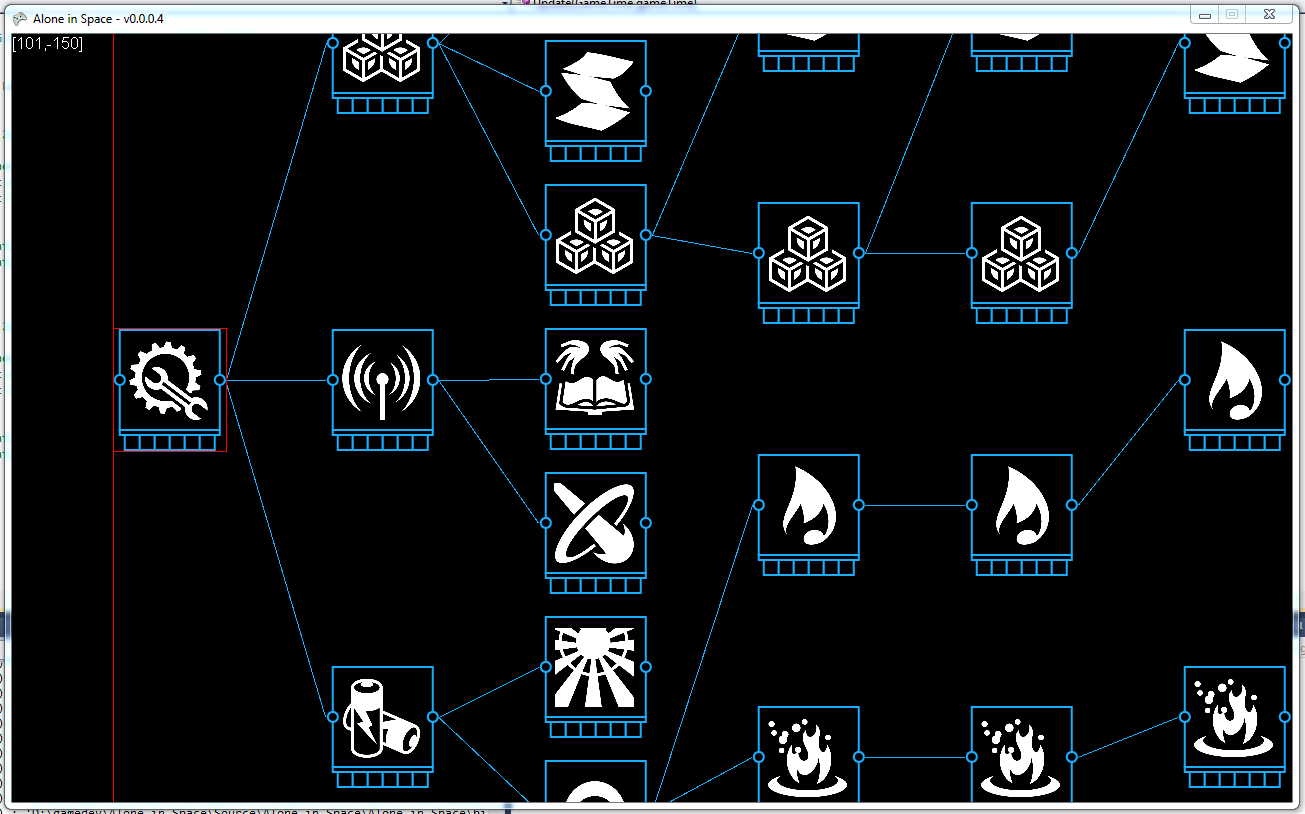
Node now react on click. Clicking on a node center the viewport on the clicked node. Later, this will open the technology window as well. There will be a small drag animation instead of the current "teleportation".

This image shows debug zones in red. You can see the vertical line defining the tree viewport limit and the zone around the first node which is currently hovered. Nothing very fancy for now.

I still have zoom issues but I'll get rid of this soon (I guess).

Jan 31, 2013

Basic research tree

Just a little drop here to show my current progress in the Research panel. Looks good!

Basic Research tree

I only had to make a small modification on my algorithm to get this working. So so proud of it! This is the first attempt at making one of the 4 research trees. Yes, there will be 4 trees like this one! Zooming in and out is done, as you can see on the image. I still have drag issues when changing the zoom but nothing to worry about.

Jan 30, 2013

Technologies

Hey! I'm going to talk a little about technologies. "Research tree" was to much used previously so now, I'll talk about technologies.

As mentioned somewhere I can't remember, I want to create a huge technology tree. But too much informations shown at a time may be disturbing. So the global tree will be separated into categories. Four categories (for now):
  1. Basics
  2. Mining
  3. Trading
  4. Transport
As for visions representing a zoom of the universe, each category will represent a part of the global technology tree. I started listing technologies for the Basic one. I'm not done yet but here is a view of it :

Click to enlarge the image

Stay tuned for more informations.

Jan 29, 2013

Research Tree (4)

Here I am, talking about the research panel for the fourth time. Previously, I made the tree management but I wasn't completely satisfied by the rendering. It was clearly not optimised, in the code nor visually (space management). I though about a way to manage this properly. It took me days to elaborate a custom algorithm. Yeah, I did it the hard way : by my self.

I had a quite hard day at work and I didn't expected to go this far tonight. I was really exhausted! But I found some energy to work anyway. The algorithm is done and optimized, the rendering is cool, good work there. Take a look at what it looked like before and after :

Old rendering system
New rendering system
As you can see, the graph takes REALLY less space on screen. By the way, node coordinates are computed only once which save CPU during rendering.

Some important details to notice : the vertical gap between the last level nodes (on the right) is configurable, as is the horizontal gap between node levels. The player will be able to change theses values to modify the rendering as wish : player's comfort is important.

Oh and one more thing. That's not implemented yet, but the player will be able to zoom in/out to get a better view of the research advancement.

That's all for tonigh.t Stay tuned and take care of yourself.

Jan 24, 2013

Research Tree (3)

Good stuff incoming! I worked on the Research Panel tonight and thought it would be great to share.

What I made looked like that :


Boring and horrible huh? Here is how it looks like now with my previously presented prototype :


That's quite better! I still have to work on tree nodes placement but... That's just awesome already. I can go to bed completely satisfied.

:-)

Research Tree (2)

Graphic tree node placement is ok for now. Not perfect but that's enough at this point. Details will be polished later.

Here we go. Say hello to the first tree node graphic representation!

This may be simple but it shows a lot of informations. The top rectangle will display the technology name. I'm still thinking about hiding it and showing it only on mouseover. In the square below is displayed the technology icon.

The use of colors will also give informations : a white icon means that the technology is not acquired and a blue icon means that the technology is already owned. With this trick the player will be able to see clearly and fast where to put efforts on.

A yellow progress bar is below the icon. The color will probably change to be easier to notice. This progress bar shows the research program's progression. The bar will disappear when the technology is aquired.

And the most important part of the research concept comes below. There are 6 slots. On the image, 3 are filled, but what does it means? To do some research, you will have to build at least one research center. This will allow you to unlock the research panel. Each research program needs a defined amount of "research points" to be completed. In order to do this, the player will have to attach research centers to research programs to work on. Each research center attached to a program will give one research points every second until it's completed or detached. So the 3 blue slots means that 3 research centers are attached to this program.

Stay in touch for the next step!